Photograms
What is a photogram?
A photogram is a picture produced with photographic materials, in this case light sensitive paper, and is created by applying light (white) to the paper which has objects layered on it, creating shadows. A photogram does not use a physical camera.
Normal Photogram
|
For this I used photographic paper, which is light sensitive, I layered objective onto the paper in a darkroom allowing the paper to not be exposed to white light. I then exposed the image to white light for a small period of time, after this I placed the image in the first of 3 chemicals, the developer, the image stays in here for 1-2 mins and after that it is put into the stop for 30 seconds-1 min, after the it is placed in the fix for minimum 3 mins then washed in water to remove excess chemicals. Once the image had gone through the dryer, your photogram should be black and white with the objects being mostly white as that is what blocked the light from the paper, and the rest of the image black like mine on the left.
|

|
Sandwich Print

|
To achieve a sandwich print I first had to make a normal photogram, using the processes I explained in the first paragraph. After this I got a new piece of photographic paper and placed it on the enlarger, I then laid my first photogram face down on top, I used a glass panel to flatten the images together then turned the light on for a short period of time. After that I took the bottom piece of photographic paper and developed it using the three processes. After this the image was inverted so the background was white and objects were black, like the image on the right.
|
Double Exposure
|
To achieve double exposure, I had to expose the photographic paper twice, however as I didn't want over expose the image so I had to expose it for less time, so 1 second twice. First I used my hand on the paper to make the initial background then on the second exposure I had to place thing on the paper as usual and then expose it again. After it had developed it gave a cool image showing both the hand and objects as you can see on the left.
|

|
Painting with Developer

|
For this I used the enlarger and photographic paper to create a photogram, after this instead of submerging the image in developer I used a paint brush and painted it on, this allowed for a more unique design to show up as the image was not fully developed. By using a paintbrush it allowed me to choose what part I wanted to develop.
|
Solarisation
|
To create a solarised photogram, I fist had to start the process normally, by using the enlarger and photographic paper and placing objects on to it, after the paper had been exposed too light I dropped it into the developer. But instead of leaving it in there I waited for the image to slightly show up and then I took it out of the developer. After that I placed it imp a tray and then back under the lights, for a short period of time making sure I don't over expose the image. After I exposed the image again I then put it back into the developer and carried out the same process till the photogram was ready.
|

|
Weaving

|
For the weaving process, I had to pick out two completed photograms. After this I picked one to cut vertically leaving about 2cm uncut at the top, each of my vertical cuts were 1cm apart. After that I got my second photogram and cut it in strip horizontally, the strips were also 1 cm in width. After this a began weaving the two images together by going under and over and securing with tape once it was done I secured with more tape, and it worked well and you can see by the image on the right.
|
Documenting the Darkroom
|
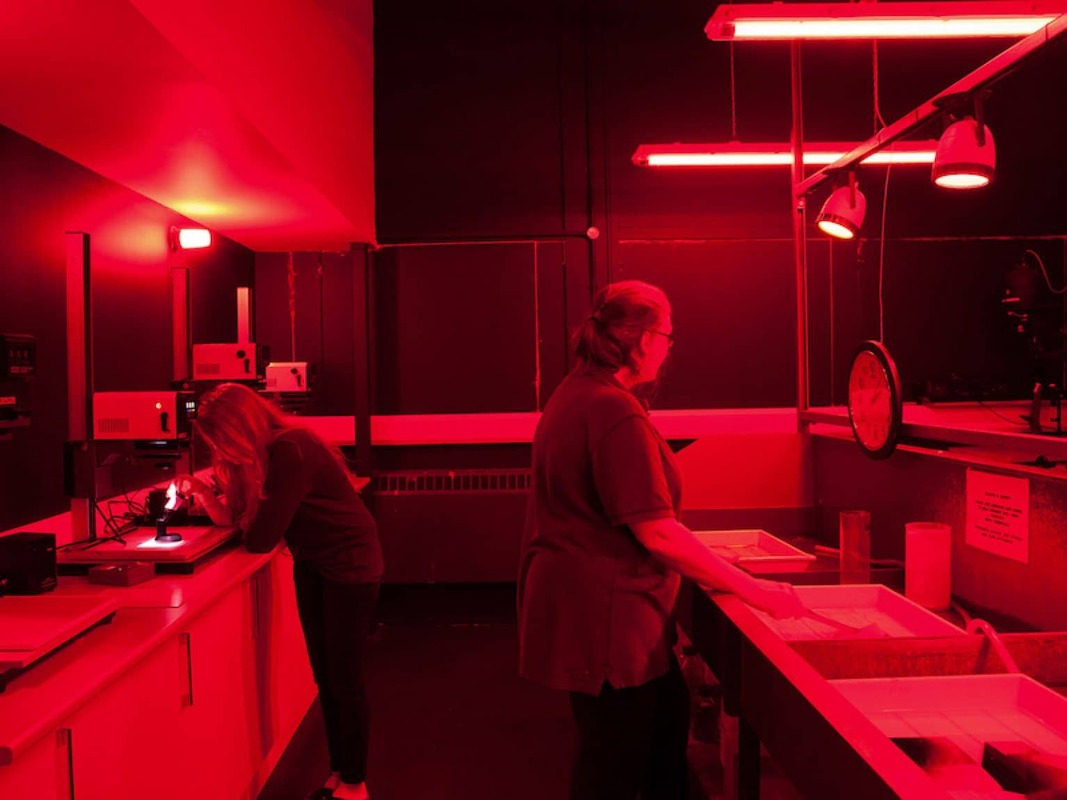
I found using the darkroom very interesting and cool. The dark room is dark but lit with red light as that doesn't effect the photographic paper. The room has enlargers, which helps you take the photogram and in the middle are the chemicals that are used to develop the photos. These chemicals are, the developer which is the first chemical you put your image in, it develops the photo, you should leave your image in the developer for around 2 mins. Next you place the image in the stop for around one minute, this stops the image from developing further. Lastly you place the image in the fix, fo0r 3-4 minutes this ensures the image doesn't turn yellow or get affected by the light when you bring it outside the darkroom. The darkroom has rules: for example, don't use your phone, don't leave the paper draw open as it is very expensive and easily ruined by the slightest bit of light, wash your hands after using the chemicals and lastly don't bring the paper out of the dark room before it's developed as the light will ruin the paper.
|
|
Pin Hole Camera
How Did I Make A Pin Hole Camera?
I created my pin hole camera using can. My can of choice was a monster and it is wider allowing for a better image. Firstly I made the lid, for this I was given a strip of black paper and had to cut out a rectangle, once this was done I cut strips leaving around 2cm uncut. After this I used the can to see how wide the lid should be, I secured it with a pierce of take then folded the strips inside securing this masking tape. Once I was happy with it I used black gaffe tape to secure and ensure no light could get into my camera once it was finished. After the lid was made I removed the top of the can with and can opener and sanded it down to ensure I didn't cut myself then used tissue to make sure the inside of the can was completely dry.
Lastly I used a pin to create a small hole in the middle of the can, then used a piece thinner tape as the shutter but also used gaffe tape to ensure no light came in. Then my camera was ready, I made my way into the darkroom and placed a piece of photographic paper into it, making sure the lid was shut before I left the darkroom, so they paper wouldn't get ruined. I then placed my can in different locations and exposed the pin hole for a short period of time, after I developed the photo as normal and these were my results. After this we got our prints and sandwich printed them, this inverted the image turning the negative to a positive. Once this was done we mounted our photos alongside each other showing the positive and negative side of the photo.
Lastly I used a pin to create a small hole in the middle of the can, then used a piece thinner tape as the shutter but also used gaffe tape to ensure no light came in. Then my camera was ready, I made my way into the darkroom and placed a piece of photographic paper into it, making sure the lid was shut before I left the darkroom, so they paper wouldn't get ruined. I then placed my can in different locations and exposed the pin hole for a short period of time, after I developed the photo as normal and these were my results. After this we got our prints and sandwich printed them, this inverted the image turning the negative to a positive. Once this was done we mounted our photos alongside each other showing the positive and negative side of the photo.
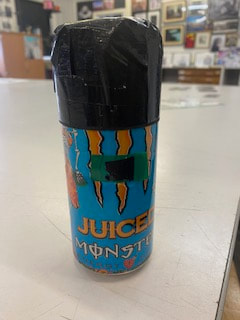
My Camera
|
The Can
|
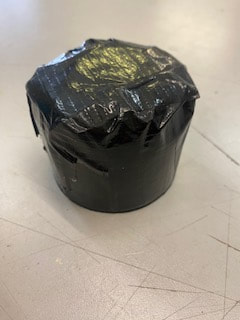
The lid
|
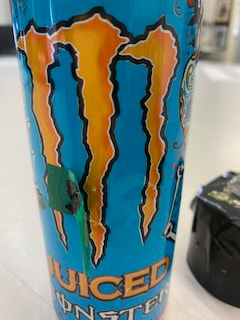
The lens and shutter
|
Final Results
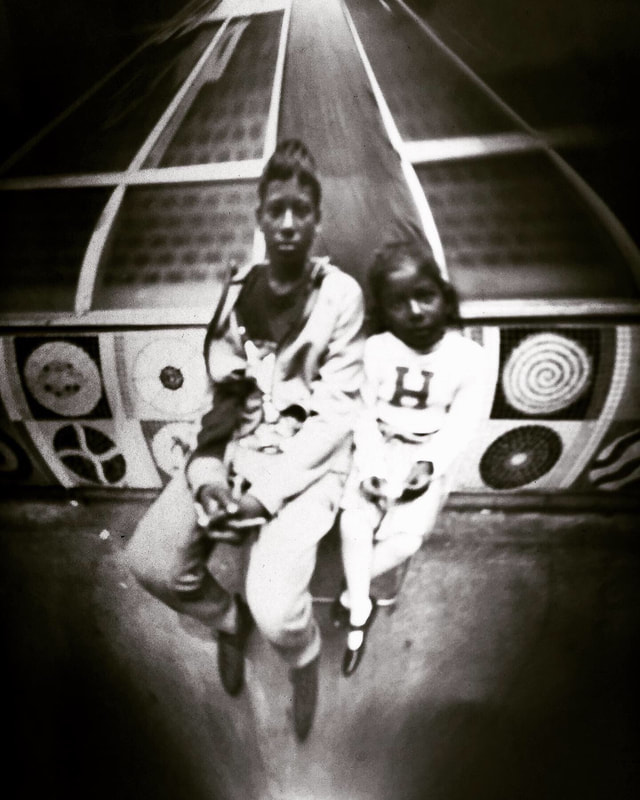
Person

|
For this image I got my friend to sit across the table from me. I used a table as it ensured the camera would be still and my photo wouldn't be blurry. I then exposed the image for just under two seconds as it was very bright this day and did not want to overexpose my image. After taking the photo I covered the pin hole back up, and then developed my photo. This was my result.
|
Double exposure
|
To create this image I had to slightly alter how I took my picture. Instead of exposing it once for longer I exposed it twice for two shorter periods of time. I first took a image exposing it for 1 second, moved my camera to a new image, after this I exposed the image for another 1 second. Then developed it as it had caught two images. Here was my result.
|

|
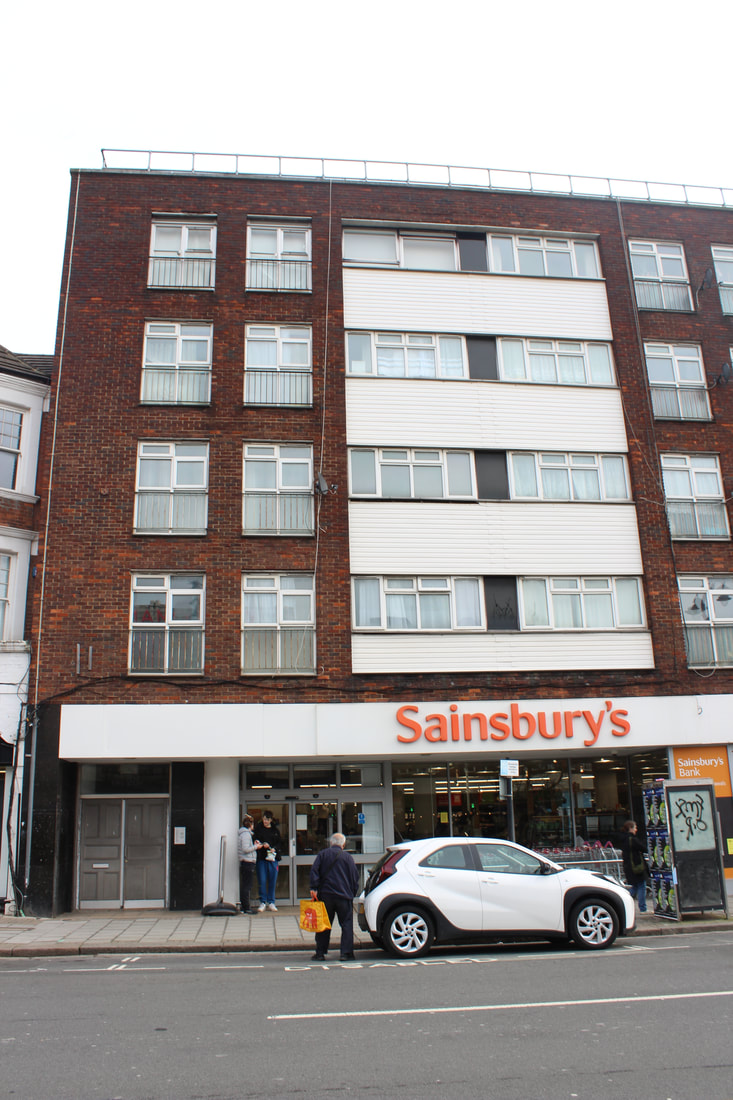
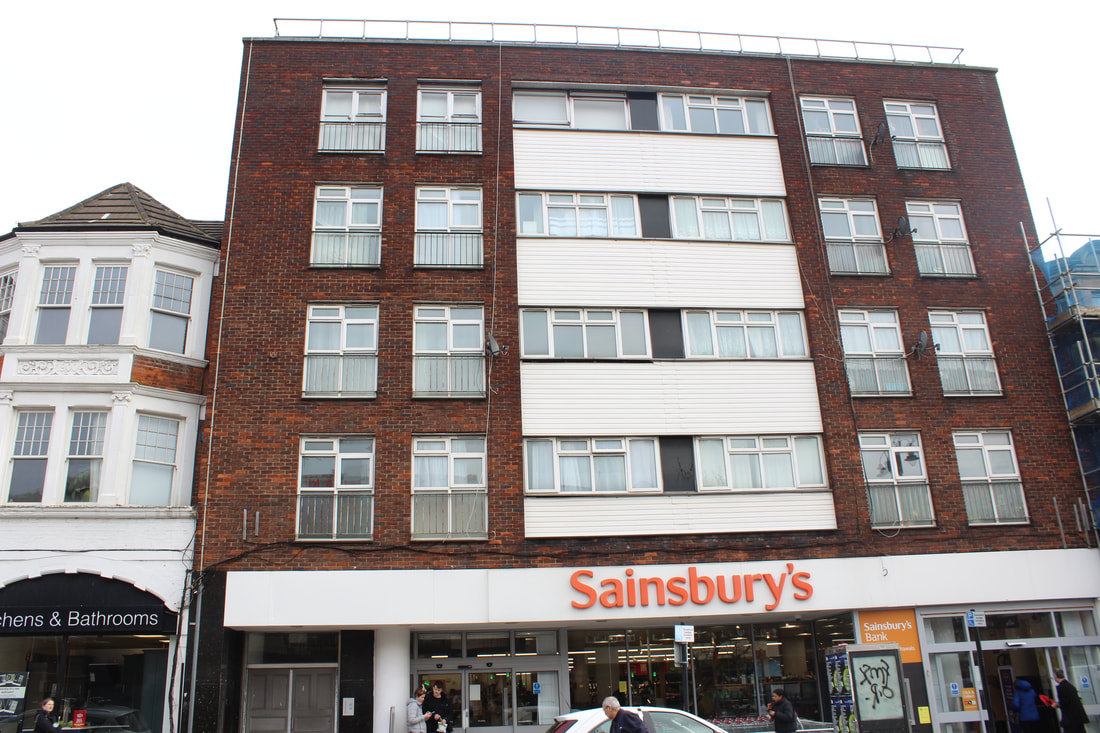
Corner of building

|
For this task I used my can to take a photo. First I put my photographic paper into the can. Then I stood in front of the corner of a buildings, close enough to get a clear image, I exposed the pin whole for around 2 seconds, making sure not to over expose the image. I had to repeat this 3 times before I got the correct exposure that I was happy with. I then developed the photo using the normal processes and this was my image.
|
Normal
|
This was the first image I took with my pin hole camera. I took this image from a window, overlooking my school. I placed it on a stack of books to get a better angle. Then I exposed my pin hole for around 2 seconds. Then I developed the image and this was my result.
|

|
Ben Nathan
|
Ben Nathan is an artist and photographer, who founded pinhole London. He uses cans to create his own camera obscura. We took inspiration from his work and created our own pinhole cameras. His artistic skills reflects on the functionality of the city and its industry and documenting urban change. His explorations into infrastructure and photography questions the changing nature of our cities environment and access to public or private space.
|

|
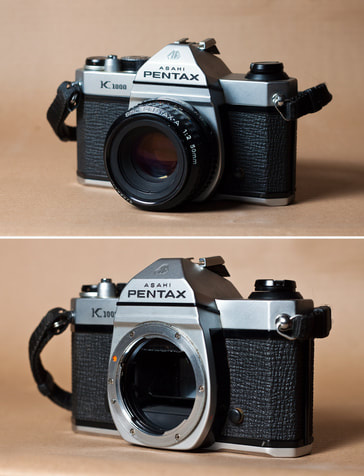
SLR Camera/ Single lens reflex.
Film Camera
|
In this task we used film camera's to take photos. To start this process we had to load the film into the camera. To do this we had to go into the darkroom as the film we were using is light sensitive. We fed the film through the back of the camera, making sure it was in properly and wouldn't get stuck. Once we did this we had to play around with the apertures to ensure at least some of our images would be correctly exposed.
Me and my partner took 16 photos, all with changing apertures, we took photos of our partners behind different backgrounds to create more interesting images. We did this over two lesson then started the process of developing our images. |
Developing Film Processes
I took photos with a range of different exposures, to ensure at least some of my film would come out well exposed, I used a fixed speed and experimented with the aperture settings, these setting were:
First once we had taken our photos, we had to transfer our film into spall which is the round plastic circle with a hole in the middle .First we had to remove the bottom of the film. We then had to feed the tape through the spall by twisting it back and forward to move the tape along, once this was done I placed it into my developing tank, which is the biggest piece of equipment, after this was done I placed the the lid on as my lid had a funnel built into it. All this had o be done in complete darkness as the film is even sensitive to red light.
After this we then had to develop the film. For this we had to use a developer chemical, a stop chemical and a fix chemical.
First I measured out 290ml of water and 10ml of developer, we combined this then took the lid off our developing tank and poured the mixture in and the lid back on. We then agitated this for around five minutes making sure to move the tank around to ensure the developer gets all over the film, whilst this is happening, my partner mixed up the stop. This again was 290ml of water and 10ml of stop. After 5 minutes I poured the developer out and my partner poured in the stop. Which only needs to be in there for one minute. I then mixed together the fix, which was 270ml of water and 30ml of fix. After the stop was poured out I poured un the fix and agitated it for five minutes. Once the five minutes was over I poured it out and begin to wash it under cold water for five minutes, making sure all the chemical were off.
After the film was washed we hung the film up to dry.
What we used for this project.

|

|

|
Processing and printing.

|
Firstly we made a contact sheet using our negatives, which we had loaded into a plastic sheet, which had 6 compartments which we fed the film through. After this we used small pieces of photographic paper, and used them as test strips. We set up our sheet of negatives and placed the photographic paper under it. Using a piece of black card, I tested out how long the image should b exposed for, by covering certain parts of the paper and letting some of the image get more exposure than other parts. Me and my partner repeated this a couple of times until we found the right time for our negatives that was 9 seconds.
After we found the correct time we placed a full size piece of paper onto the negatives and exposed the whole thing for 9 seconds, to make our contact sheet. Here was my result. |

|
Process
After the contact sheet was made, me and my partner picked out 3 images we wanted to develop further. Here is what we did to create them. Firstly I put the chosen negative into the neg holder. Which is a compartment in the enlarger that holds negatives. After this you choose the size of the image, you do this by using the handle on the side of the enlarger which moves it up and down. After this you have to make sure the image is in focus, you do this by using the focus finder, and your looking for the grain of the silver, which shows where the silver has been affected by light.
Then you have to make another test strip to see which exposure time is best for your image as all had different exposures. To make the test strip, I got my image, then added a piece of photographic paper on top. After this I added a glass panel to ensure my paper wouldn't move as I placed black card over certain parts.
After this I judge from the test strip how long to expose the image for. I then expose the whole image for a certain amount of time, enlarging the photographs to get my final images.
Test strips
By using these strips I was able to differentiate between the exposures and clearly see what timing to use for each image to get the correct exposure.

|
|
|
My prints

exposed for 1.5 seconds
|

exposed for 2-2.5 seconds
|

expoed for 1.5 seconds
